The Ultimate Guide to Making Homemade Nut Butters
Nut butters are a beloved pantry staple, known for their creamy texture, rich flavor, and versatility. Whether spread on toast, swirled into smoothies, or used in baking, nut butters are packed with healthy fats, protein, and essential nutrients. But did you know that making nut butter at home is easy, cost-effective, and healthier than store-bought versions, which often contain added sugars, preservatives, and oils?
In this ultimate guide, we’ll walk you through the process of making your own nut butters, including popular varieties like almond, peanut, cashew, and hazelnut. We’ll also share tips on storage, flavor variations, and creative ways to use your homemade nut butters in both cooking and baking.
Why Make Nut Butter at Home?
Making nut butter at home comes with a variety of benefits:
- Healthier: Homemade nut butters don’t contain added sugars, hydrogenated oils, or artificial preservatives.
- Cost-Effective: Buying nuts in bulk and making your own butter is often much cheaper than buying pre-made nut butters.
- Customization: You can control the flavor and texture to your exact liking, experimenting with different nuts, spices, and sweeteners.
Essential Tools for Homemade Nut Butter
To make your own nut butter, you don’t need a lot of special equipment. Here’s what you’ll need:
- Food Processor or High-Powered Blender: The key tool for turning nuts into creamy butter. A food processor works best as it can handle the thickness of nut butter.
- Spatula: For scraping the sides of the processor and ensuring everything blends evenly.
- Airtight Storage Container: For storing your nut butter once it’s made. Glass jars or containers with tight-fitting lids are ideal.
Step-by-Step Instructions for Making Nut Butters
No matter the type of nut butter you’re making, the basic process is the same. Here’s a simple, foolproof method to follow.
1. Choose Your Nuts
Start with your preferred nuts. You can use raw or roasted nuts, depending on the flavor you’re after. Roasting nuts brings out a deeper, richer flavor, while raw nuts yield a more subtle taste.
2. Process the Nuts
Add your nuts to a food processor or blender. The general rule is to use about 2 cups of nuts to make roughly 1 cup of nut butter.
- Step 1: Begin processing the nuts on low speed. You’ll notice they break down into a powdery texture first. Scrape down the sides of the processor bowl if needed.
- Step 2: Continue processing for about 5-10 minutes, stopping occasionally to scrape down the sides. The nuts will go through different stages: from powdery to clumpy to creamy. Be patient—the oils in the nuts need time to release.
- Step 3: Once the mixture reaches a creamy consistency, add any flavorings or sweeteners (if desired).
3. Add Flavor Variations (Optional)
One of the perks of making your own nut butter is the ability to customize the flavor. Here are some ideas to make your nut butter extra special:
- Sweeteners: A teaspoon of honey, maple syrup, or agave can add a touch of sweetness.
- Spices: A pinch of cinnamon, nutmeg, or vanilla extract can elevate the flavor, especially for almond and cashew butter.
- Salt: A little sea salt or pink Himalayan salt balances out the sweetness and enhances the flavor of your nut butter.
- Cocoa or Coffee: Add cocoa powder for a chocolatey twist or a tablespoon of coffee grounds for a mocha flavor.
- Coconut: Mix in shredded unsweetened coconut for a tropical flair.
4. Adjust Consistency
If you prefer your nut butter a little smoother or runnier, you can add a bit of neutral oil like sunflower or grapeseed oil, a teaspoon at a time. Blend until you reach your desired consistency.
5. Store Your Nut Butter
Once your nut butter is done, transfer it to an airtight container. Store it in the refrigerator to extend its shelf life. Homemade nut butter can last about 2-3 weeks in the fridge, but it’s unlikely to stick around for that long!
Popular Nut Butter Recipes
Now that you know how to make the basic nut butter, let’s explore some of the most popular varieties and how to prepare them.
1. Almond Butter
Almond butter is packed with healthy fats, protein, and vitamin E, making it a nutritious choice for breakfast or snacks.
- Ingredients: 2 cups of raw or roasted almonds.
- Flavor variations: Add a pinch of cinnamon, a drizzle of honey, or a splash of vanilla extract.
- Instructions: Simply process the almonds in a food processor until smooth. Scrape down the sides as needed. If the butter seems too thick, add a little neutral oil to loosen it up.
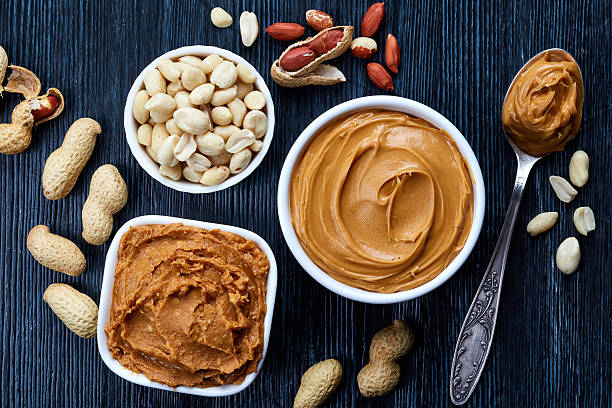
2. Peanut Butter
Peanut butter is a classic favorite, especially for sandwiches and smoothies. You can make it as creamy or chunky as you prefer.
- Ingredients: 2 cups of roasted peanuts.
- Flavor variations: Add a pinch of salt and a little honey for sweetness or a dash of cinnamon for warmth.
- Instructions: Process the peanuts until smooth, scraping down the sides as needed. For chunky peanut butter, add extra peanuts and pulse a few times to create texture.
3. Cashew Butter
Cashew butter has a creamy, smooth texture and a slightly sweet flavor. It’s perfect for baking, smoothies, or spreading on toast.
- Ingredients: 2 cups of roasted cashews.
- Flavor variations: Add a teaspoon of coconut oil and a drizzle of maple syrup for a slightly tropical taste. A pinch of sea salt will bring out the richness of the cashews.
- Instructions: Process cashews until smooth. If you prefer a creamier consistency, add a small amount of coconut oil or other neutral oil.
4. Hazelnut Butter
Hazelnut butter has a rich, nutty flavor that pairs well with chocolate or as a spread for toast and pastries.
- Ingredients: 2 cups of roasted hazelnuts.
- Flavor variations: A tablespoon of cocoa powder or melted dark chocolate for a hazelnut-chocolate spread.
- Instructions: Hazelnuts have a skin that can be a little bitter. To remove the skins, roast the hazelnuts and rub them in a kitchen towel to peel them off before processing. Then, follow the same process as other nut butters.
Creative Ways to Use Nut Butters
Nut butters are incredibly versatile. Here are some fun and delicious ways to incorporate them into your meals:
- Smoothies: Add a tablespoon of nut butter to your smoothie for a creamy texture and protein boost.
- Baking: Use nut butters in baking recipes such as cookies, cakes, and muffins for added richness.
- Sandwiches and Toast: The classic PB&J is always a winner, but try almond butter with banana slices or cashew butter with a drizzle of honey for a sweet twist.
- Energy Balls: Combine nut butter with oats, honey, and a bit of dark chocolate for an easy, no-bake energy snack.
- Salad Dressings: Nut butters, particularly peanut or cashew butter, make a great base for creamy, Asian-inspired salad dressings.
- Curries and Sauces: Cashew butter can add creaminess to a curry sauce, while peanut butter works well in savory sauces like satay or stir-fries.
Tips for Storing Homemade Nut Butters
- Refrigeration: Homemade nut butter should be kept in the fridge to prevent the oils from going rancid.
- Separation: Natural nut butters will sometimes separate, with the oil rising to the top. Simply stir it back together before using.
- Labeling: If you make different types of nut butters, label the jars with the date you made them so you can keep track of freshness.
Make Nut Butters Your Own
Making nut butters at home is not only a fun and rewarding experience, but it also allows you to enjoy a healthier, more affordable alternative to store-bought versions. By using simple ingredients and experimenting with different flavor variations, you can create personalized nut butters that suit your taste preferences and dietary needs.
So, whether you’re a peanut butter purist, a fan of cashew creaminess, or a hazelnut enthusiast, making your own nut butter is a fantastic way to enjoy a delicious, nutrient-dense spread. Happy blending, and enjoy your homemade creations!